
Even if you’ve just started your DIY journey, you’ll know that you can’t just use your standard pliers for every project. Instead, you’ll have to rely on a complete set with different jaws & sizes. You can’t just use a makeshift solution for every project.
Instead, you will need to focus on getting some dedicated tools for specific tasks. Otherwise, you will notice that your pliers will wear out or get damaged in no time. You will not be able to get more than a few years out of the tools.
For this reason, I’ll strongly recommend that you educate yourself on the different plier sets and their application. This is especially true for the locking pliers if you occasionally work with pipes or wooden sheets. So, set some time aside to expand your knowledge, and you’ll be sorted out in the long run.
What Are Locking Pliers?
Locking pliers can be pretty versatile, but I was beyond confused about how to use the sophisticated linkage mechanism inside these pliers. I had to spend a bit of my time with local experts and get some pointers on how to effectively use the locking pliers.
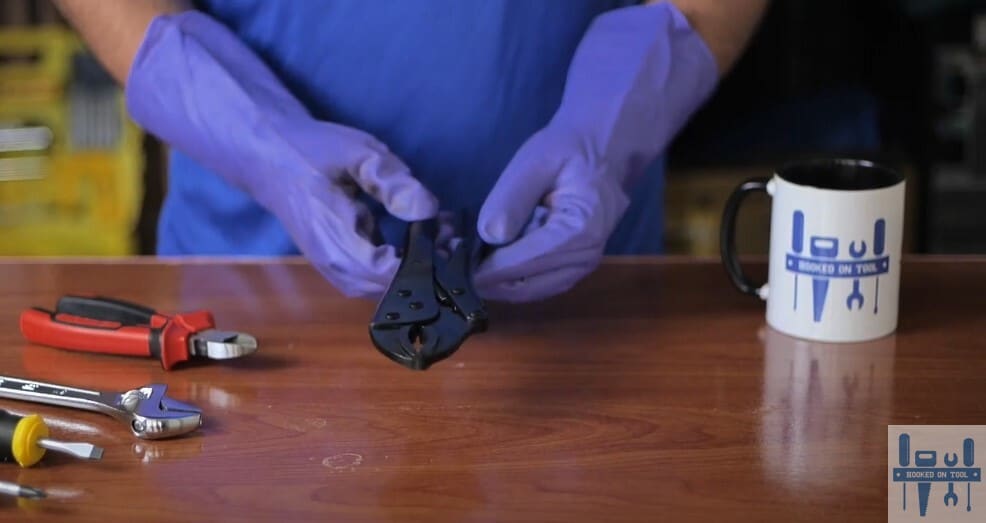
These pliers bring four bars to the table, one with the top handle and adjustment screw, one with the lower handle, one linking the two handles, and the last one with the pivoting lower jaw. The structure is much harder to understand when you compare these pliers with your traditional options.
The unique thing about these pliers is that you will not have to maintain the pressure. You can just use the “locking” mechanism by twisting the knob, and that will hold the object (whatever you’re working with) in its proper place.
Once the knob is sufficiently turned, it will retain the pressure on the object, and you can just let go of the pliers. These are one of the best options for plumbers as they don’t have to keep their hands busy when working with different pipes.
Using Locking Pliers
- If you follow a systematic routine, it is not that hard to use the locking pliers. Just figure out the function of the four bars linkage mechanism, and the rest is easy. You can simply start by:
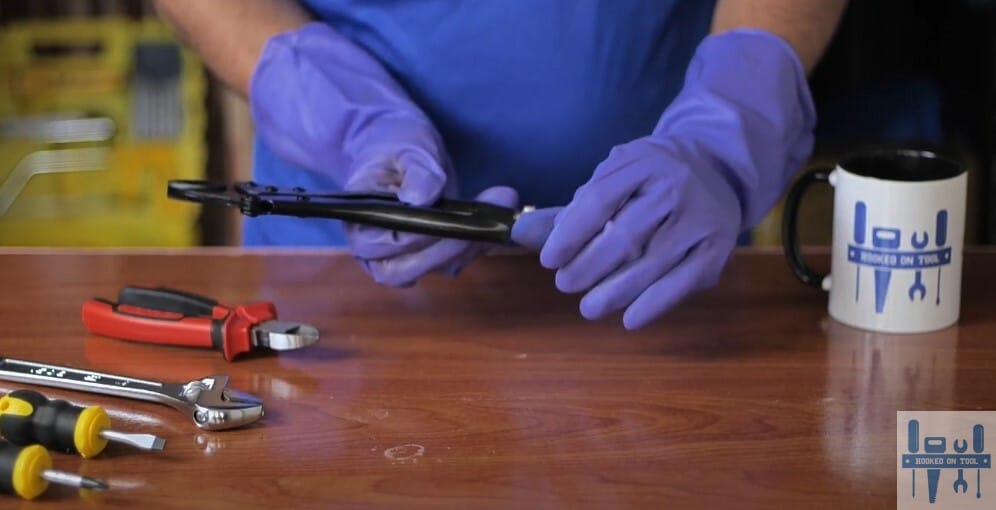
- Use the top handle with the release button when your pliers are locked in a closed position. The jaws will not be able to move until you release the locking mechanism, and you should never put force on the locking pliers when trying to open them up.
- Depressing the unlock button will release the grip, and the locking pliers will open up. Now, you can freely wrap around the locking plier jaws onto a different object.
- You can use the bolt on the second handle to open up or close up the jaws, depending upon the width of the object that you wish to clamp. Once again, don’t force anything, and let the knob do most of the work. Otherwise, you will just be complicating the situation for yourself.
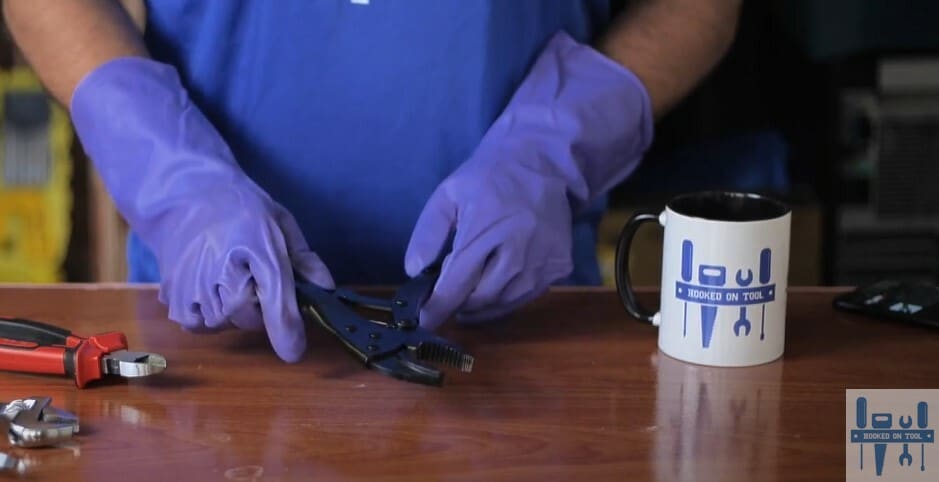
- Now, you just gotta squeeze on both handles and let the pliers lock up. If the knob is too tight and there is too much pressure, then the pliers will not lock, and you will have to use more force. So, be sure to loosen up the knob if you’re not able to lock the pliers.
- Lastly, you can just let go of the pressure, and the locking pliers will keep the intended object isolated in one space. You will not have to deal with more hassle on your end, and figuring out how to manage the locking pliers will become increasingly simple.
As long as your pliers are not damaged or rusted out, there aren’t any special steps that you gotta follow. Just getting through this routine will make your life easier, and you will not have to go through any challenges when working with the locking pliers.
Usage
Everything mostly boils down to how creative you’re willing to be. It can take a while to get used to the locking pliers, but once you’re comfortable, you’ll be using them for every other job. This includes everything from adjusting screws to clamping down on material and pulling nails out of the wall.
- Extracting Nails
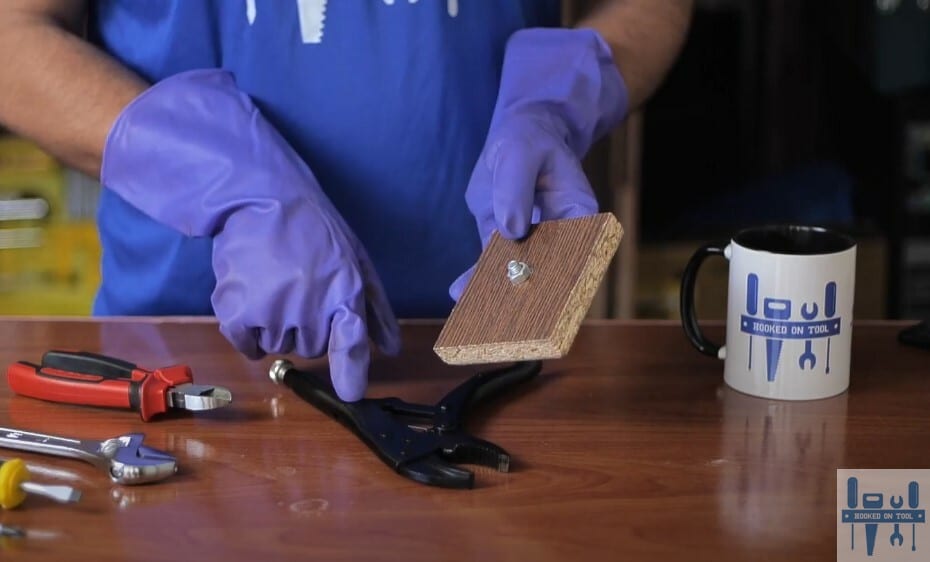
The main application of these pliers is that they clamp down on the screws or nails with incredible force. You will not have to focus more on holding the pliers, and all the pull force will be translated into getting the nail out of the wall.
You just have to clamp down on the screw head or the nail head and then lock up the pliers before pulling them out. The crooked tip of these pliers will make your life easier, and you will not have to go through any extensive challenges down the road.
- Cutting Wires
While you might think that the structure of the locking pliers will restrict them from cutting wires, you’re dead wrong. The best thing about these pliers is the wire-cutting mechanism found at the rear end of the jaws.
This end will make your life much easier, and you will not have to go through the hassle of switching pliers again. Similarly, you can use these cutters on cable ties and a ton of other items that you need to tidy up the project.
- Clamping & Holding
Now, the main feature that you can expect from the locking pliers is the clamping option. You can just use minimal force and lock down the pliers in a clamped location. From there, you can free up your hands and keep working on the project.
Similarly, when you’re having trouble gripping different items directly, just use the locking pliers, and that will ease your trouble. Everything boils down to how you’re planning on addressing the situation, and keeping track of these pointers will help you out a ton.
Lastly, you’ll find these pliers being used most commonly by welders and plumbers. So, if you’re getting into similar projects, then educating yourself on the basics will make your life much easier. You can also ask some local experts to guide you on how to use these pliers effectively.
Note: The only and most common issue that I find people getting stuck in is that they will struggle to clamp down the pliers. The reason behind this issue is that the knob is over-tightened on the second handle, and you will have to free up the knob.
It takes a fair bit of time and effort to adjust the clamping force when the knob is too tight. So, it is best to give yourself some space. There is no need to over complicate the situation for yourself from the get go, and you gotta focus more on how to ease into the clamping position.
I personally found that if I had to use excessive force then I was probably doing something wrong. So, if you’re in the same boat, then now might be a good time to loosen up the knob. From there, you can test out different orientations to figure out the perfect fit for clamping down on the pipes or other metal.
The Takeaway
I’ve found the locking pliers to be one of the best additions to my toolkit, and you should also give it a shot. These pliers are relatively affordable and you will not have to go over budget when using these pliers in your setup. So, take a hit to the budget and get yourself some locking pliers.
There is no need to get overwhelmed by the four-bar linkage mechanism held by these pliers. It is pretty sophisticated when you take a glance, but the process behind these pliers is relatively simple. You can use the button on the top handle to free up the pliers and use the knob to adjust the jaws.
From there, you can squeeze down on the handles and let the jaws go into a locking position. When the handles are locked out, you’ll have your hands free, and you can start working on your welding or plumbing project.
However, if you’re having trouble getting the hang of these pliers, then head over to the local workshops. The experts working there will make your life much easier and you will not have to hassle even a bit when it comes to taking care of these pliers. Hopefully, you’ll be sorted out in no time.